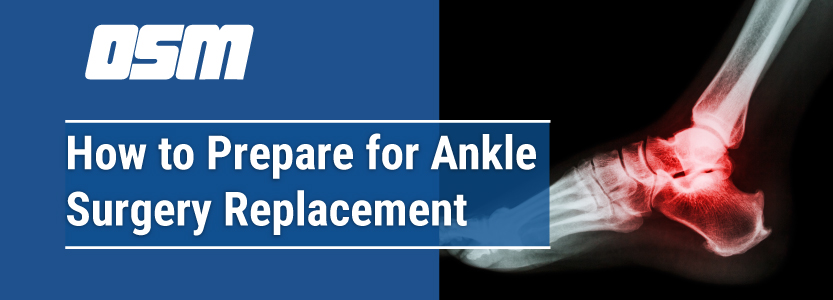
How to Prepare for Ankle Replacement Surgery

Article featured on WebMD

After you’ve scheduled your ankle replacement surgery, you need to take some steps to make sure the operation goes smoothly. First, set up some time with your doctors to make a plan and get yourself ready:

Your primary care doctor.

It’s a good idea to get a physical exam to make sure you’re healthy enough to have surgery. This is especially important if you have long-term health conditions, such as diabetes.

Your physical therapist.

They’ll measure how well your ankle works before surgery. This will help them check your progress as your joint heals and you start to move again. They can teach you how to use the crutches or walker you’ll need to get around after the operation, too.

Your anesthesiologist.

They are the doctor who will keep you pain-free during surgery. Usually you meet with them on the day of your operation. They’ll explain the type of anesthesia they’ll use and will ask you if you’ve had any bad reactions in the past.

Get Your Body Ready

You might need to do some things that will let you heal quickly:

  • If you smoke, stop. It hurts your heart and blood vessels and will make your recovery time longer.
  • Changes in medication . If you take blood thinners or anticoagulants, your doctor will discuss when to stop taking them before having surgery. These include anti-inflammatory pain relievers like aspirin and ibuprofen. They can cause extra bleeding if you take them too close to surgery.
  • Tell your surgeon about other prescription and over-the-counter drugs that you take. You might need to temporarily stop them or take an alternative treatment.
  • Watch for illness. If you get sick or have symptoms of infection in the week before surgery, let your doctor know right away.
  • Keep clean. Stick to any directions you’re given for showering or bathing before surgery. Your surgeon might ask you to wash with a special soap that kills the bacteria on your skin.

Prepare Your Home for Recovery

You won’t be able to walk for a period of time after surgery. Before you go to the hospital, you can make your home a safe place to recover by following these tips:

  • Get rid of tripping hazards. Pack away throw rugs, and move any cords or other obstacles on the floor.
  • Bathroom changes. Get a chair for your tub or shower so you can bathe safely.
  • Keep must-have items handy. Throughout your home, put things you use often within easy reach. Set them in places where you don’t need to bend over or reach up to get to them.
  • Arrange for help. Make sure someone will be with you for at least the first few days after surgery. You’ll need to stay off your feet and keep your ankle elevated. Your surgeon will tell you how long.

Going to the Hospital

Don’t eat or drink after midnight the evening before your surgery.

Don’t wear any makeup or jewelry to the hospital. Pack a small bag to bring with you, though. Your surgeon might give you a list of suggested items to pack. These might include:

  • Insurance information
  • A copy of your advance medical directives and medical history
  • Medicines you regularly take
  • Personal care items, such as your toothbrush and hairbrush
  • Comfortable clothing to wear home, including shorts or pants that are very loose around the ankles

The Orthopedic & Sports Medicine Center of Oregon is an award-winning, board-certified orthopedic group located in downtown Portland Oregon. We utilize both surgical and nonsurgical means to treat musculoskeletal trauma, spine diseases, sports injuries, degenerative diseases, infections, tumors and congenital disorders.

Our mission is to return our patients back to pain-free mobility and full strength as quickly and painlessly as possible using both surgical and non-surgical orthopedic procedures.

Our expert physicians provide leading-edge, comprehensive care in the diagnosis and treatment of orthopedic conditions, including total joint replacement and sports medicine. We apply the latest state-of-the-art techniques in order to return our patients to their active lifestyle.

If you’re looking for compassionate, expert orthopedic surgeons in Portland Oregon, contact OSM today.

Phone:
503-224-8399

Address
1515 NW 18th Ave, 3rd Floor
Portland, OR 97209

Hours
Monday–Friday
8:00am – 4:30pm

Ankle Sprain Rehab Exercises to Get You Back on Your Feet

Article featured on verywellfit

One of the most common sports injuries, an ankle sprain occurs when the ligaments surrounding the ankle joint are stretched or torn as the ankle joint and foot is turned, twisted, or forced beyond its normal range of motion.

If you suspect an ankle sprain, there are things you can do immediately after being injured to protect your ankle. Once the initial injury begins to heal, use exercises to rehabilitate your ankle and get back to the activities you love.

Ankle Sprain Causes and Grades

The most common cause of an ankle sprain in athletes is a missed step or a missed landing from a jump or fall. Ankle sprains vary in severity and are classified by the degree of severity:

  • Grade I: Stretch and/or minor tear of the ligament without laxity (loosening)
  • Grade II: Tear of ligament plus some laxity
  • Grade III: Complete tear of the affected ligament (very loose)
Immediate Treatment

For immediate relief, you can use the R.I.C.E. treatment plan: rest, ice, compression, and elevation.1 While there is general agreement that the best approach to an ankle sprain is immediate rest, there is some conflicting advice about what comes next.

Until definitive answers are available, the following approach is still the most widely recommended:

  • Rest: Avoid weight bearing for 24 hours, or longer for a severe sprain. You may need to use crutches.
  • Ice: Apply ice (bagged, crushed ice wrapped in a thin towel) to the ankle joint. To avoid frostbite, ice should not be left in the area longer than 20 minutes at a time. Ice for 20 minutes every two hours for the first 24 hours to control swelling.
  • Compression: Wrap the ankle with an elastic bandage (start at the toes and wrap up to the calf) to help prevent swelling and edema.
  • Elevation: Raise the ankle above the hip or heart to reduce swelling.

If the swelling doesn’t subside in 48 to 72 hours, or if you are unable to bear weight on the injured ankle within 48 hours, seek medical treatment for a complete evaluation.

Ankle Sprain Rehab

After the initial 24 to 48 hours of rest and icing, slowly begin bearing weight over several days as tolerated. Avoid full weight bearing during this phase. Gradually progress to full weight bearing. Try to use a normal heel-toe gait.

Start doing rehabilitation exercises as soon as you can tolerate them without pain. Range of motion (ROM) exercises should be started early in the course of treatment. Gradual progression to other weight-bearing exercises should follow shortly after.

Assessment of the Ankle Joint

After an ankle injury, the joint should be assessed for misalignment or structural defects caused by the sprain. A physician will check the joint and test for weakness or deficits in soft tissues (tendons, ligaments, and cartilage).

Your injury may require taping or bracing. If a fracture or dislocation is suspected, an MRI or an X-ray will confirm the diagnosis and determine the most appropriate treatment.

Any ankle injury that does not respond to treatment in one to two weeks may be more serious. Consult a physician for a thorough evaluation and diagnosis.

Types of Rehab Exercises

Specific exercises are prescribed to help restore ankle stability and function. These exercises are progressive (they should be done in order) and are generally prescribed for range of motion, balance, strength, endurance, and agility.

  • Range of motion (flexibility) exercises
  • Progressive strength exercises
  • Balance (proprioception) exercises
  • Progressive endurance exercises
  • Agility (plyometric) exercises

The following exercises can be used to rehab a Grade I ankle sprain. If your sprain is more severe, you should follow the plan prescribed by your physician and physical therapist. Your physical therapist can design the best program for your specific injury and your limitations.

Flexibility and Range of Motion Exercises

As soon as you can tolerate movement in the ankle joint and swelling is controlled, you can begin gentle stretching and range of motion exercises of the ankle joint.

  • Towel stretch: The towel stretch is a simple and effective way to improve the flexibility of your calf muscles. While seated on the floor, simply wrap a towel around the ball of the foot and gently pull the towel so the toes and ankle flex up.
  • Standing calf stretch: Stretching your calf muscles is important to help loosen the muscles and prevent further injury. While facing a wall, place one leg behind. Lean toward the wall until you feel a slight stretch in the calf of your extended leg.
  • Achilles soleus stretch: Slowly stretching your Achilles tendon can help you prevent injury and keep the tendon flexible. To stretch your tendon, stand an arm’s length away from the wall and place one leg back. Keeping the leg slightly bent at the knee, slowly lean forward and press your heel to the floor.
  • Toe circles: Move your ankle through its entire range of motion—up and down, in and out, and in circles. Move only the ankle and not the leg.
  • Alphabet exercise: With your leg extended, try to write the alphabet in the air with your toes.

Strengthening and Endurance Exercises

Once you have a good range of motion, joint swelling is controlled, and pain is managed, you can begin strengthening exercises.

  • Step-ups: Begin on a short step and slowly step up in a controlled manner while focusing on contracting the muscles of the foot, ankle, and leg. Turn around and slowly step down in the same manner. Repeat 20 times, several times per day.
  • Towel curls: To perform a towel curl, you will need to be seated and barefoot. Place a small towel on a smooth surface in front of you. Grab the towel with your toes. Keep your heel on the ground and curl your toes to scrunch the towel as you bring it toward you. Let go and repeat until you’ve moved the towel to you. Then, do the action in reverse to push the towel away from you. Repeat 10 times, several times a day.
  • Isometric exercises: Gently push against an immovable object in four directions of ankle movement—up, down, inward, and outward. Hold for 5 seconds. Repeat 10 times, several times a day.
  • Tubing exercises: Use elastic tubing to create gentle resistance. Wrap the elastic band around the ball of the injured foot and resist the band as you move your ankle up, down, inward, and outward. These exercises incorporate the four movements of the foot: inversion, eversion, plantar flexion, and dorsiflexion. Perform three sets of 15 repetitions for each movement and repeat several times a day to build endurance.
  • Toe raises: Stand with your heel over the edge of a step. Raise up on the ball of your foot, hold for 3 seconds, and slowly lower your heel to the starting position. Perform 20 repetitions several times a day.
  • Heel and toe walking: Walk on your toes for 30 seconds. Switch and walk on your heels for 30 seconds. Build up to 1 minute on toes and heels alternating for 5 to 10 minutes. Perform several times per day.

Proprioception Exercises

After you are able to place your full weight on the injured ankle without pain, you may begin proprioceptive training to regain balance and control of the ankle joint.

  • One-leg balance: Try to stand on one leg for 10 to 30 seconds. Increase the intensity by doing this with your eyes closed.
  • One-leg squat: Stand on the affected leg with your foot pointing straight ahead and the knee of the other leg slightly bent. Extend your arms for balance if necessary. Lift the non-supporting foot slightly off the floor and lower to a squat position.
  • Balance board ball toss: While balancing on a wobble board, balance board, or BOSU, catch and toss a small (5-pound) medicine ball with a partner.
  • Balance board with half-squats: While balancing on a wobble board, perform 10 slow, controlled half-squats.
  • Step up onto balance board: Place a balance board (or soft pillow or foam pad) 6 to 8 inches higher than your starting point. Step up 10 times.
  • Step down onto balance board: Place a balance board (or soft pillow or foam pad) 6 to 8 inches lower than your starting point. Step down 10 times.
  • One-leg squat and reach: Stand on the affected leg and raise the other leg slightly. As you squat, reach toward the floor with the hand opposite your standing leg.

Agility Exercises

Once you have regained balance, strength, and control, you can begin working on agility.

  • Lateral step up and down: Step up sideways to a step bench and then step down sideways.
  • Plyometric exercises: These can include single-leg hops (hop forward and concentrate on “sticking” the landing), single-leg spot jumps (hop from spot to spot on the floor), or reactive spot jumps (place numbered pieces of tape on the floor and as a partner calls out a number, hop to that number).
  • Sport-specific skills and drills: Sport-specific drills can be added as long as return to sports guidelines are followed.

The Orthopedic & Sports Medicine Center of Oregon is an award-winning, board-certified orthopedic group located in downtown Portland Oregon. We utilize both surgical and nonsurgical means to treat musculoskeletal trauma, spine diseases, sports injuries, degenerative diseases, infections, tumors and congenital disorders.

Our mission is to return our patients back to pain-free mobility and full strength as quickly and painlessly as possible using both surgical and non-surgical orthopedic procedures.

Our expert physicians provide leading-edge, comprehensive care in the diagnosis and treatment of orthopedic conditions, including total joint replacement and sports medicine. We apply the latest state-of-the-art techniques in order to return our patients to their active lifestyle.

If you’re looking for compassionate, expert orthopedic surgeons in Portland Oregon, contact OSM today.

Phone:
503-224-8399

Address
1515 NW 18th Ave, 3rd Floor
Portland, OR 97209

Hours
Monday–Friday
8:00am – 4:30pm

Recovery from an Ankle Sprain

Article featured on Harvard Health Publishing

All it takes is a simple misstep, and suddenly you have a sprained ankle. An ankle sprain is one of the most common musculoskeletal injuries in people of all ages, athletes and couch potatoes alike. The injury occurs when one or more of the ligaments in the ankle are stretched or torn, causing pain, swelling, and difficulty walking. Many people try to tough out ankle injuries and don’t seek medical attention. But if an ankle sprain causes more than slight pain and swelling, it’s important to see a clinician. Without proper treatment and rehabilitation, a severely injured ankle may not heal well and could lose its range of motion and stability, resulting in recurrent sprains and more downtime in the future.

Anatomy of an ankle sprain

The most common type of ankle sprain is an inversion injury, or lateral ankle sprain. The foot rolls inward, damaging the ligaments of the outer ankle — the anterior talofibular ligament, the calcaneofibular ligament, and the posterior talofibular ligament. (Ligaments are bands of fibrous tissue that connect bone to bone; see illustration.)

Ankle ligaments

ankle-ligaments

Less common are sprains affecting the ligaments of the inner ankle (medial ankle sprains) and syndesmotic sprains, which injure the tibiofibular ligaments — the ligaments that join the two leg bones (the tibia and the fibula) just above the ankle. Syndesmotic sprains, which occur most often in contact sports, are especially likely to cause chronic ankle instability and subsequent sprains.

The severity of an ankle sprain depends on how much damage it does and how unstable the joint becomes as a result. The more severe the sprain, the longer the recovery (see “Grades of ankle sprain severity”).

Grades of ankle sprain severity

Severity Damage to ligaments Symptoms Recovery time
Grade 1 Minimal stretching, no tearing Mild pain, swelling, and tenderness. Usually no bruising. No joint instability. No difficulty bearing weight. 1–3 weeks
Grade 2 Partial tear Moderate pain, swelling, and tenderness. Possible bruising. Mild to moderate joint instability. Some loss of range of motion and function. Pain with weight bearing and walking. 3–6 weeks
Grade 3 Full tear or rupture Severe pain, swelling, tenderness, and bruising. Considerable instability and loss of function and range of motion. Unable to bear weight or walk. Several months

Immediate ankle sprain treatment

The first goal is to decrease pain and swelling and protect the ligaments from further injury. This usually means adopting the classic RICE regimen — rest, ice, compression, and elevation. If you have severe pain and swelling, rest your ankle as much as possible for the first 24–48 hours. During that time, immerse your foot and ankle in cold water, or apply an ice pack (be sure to cover the ankle with a towel to protect the skin) for 15–20 minutes three to five times a day, or until the swelling starts to subside.

To reduce swelling, compress the ankle with an elasticized wrap, such as an ACE bandage or elastic ankle sleeve. When seated, elevate your ankle as high as you comfortably can — to the height of your hip, if possible. In the first 24 hours, avoid anything that might increase swelling, such as hot showers, hot packs, or heat rubs. Nonsteroidal anti-inflammatory drugs such as ibuprofen can help reduce pain and swelling and may also speed recovery.

Ankle sprain medical evaluation

Unless your symptoms are mild or improving soon after the injury, contact your clinician. He or she may want to see you immediately if your pain and swelling are severe, or if the ankle feels numb or won’t bear weight. He or she will examine the ankle and foot and may manipulate them in various ways to determine the type of sprain and the extent of injury. This examination may be delayed for a few days until swelling and pain improve; in the meantime, continue with the RICE regimen.

X-rays aren’t routinely used to evaluate ankle injuries. Ligament problems are the source of most ankle pain, and ligaments don’t show up on regular x-rays. To screen for fracture, clinicians use a set of rules — called the Ottawa ankle rules, after the Canadian team that developed them — to identify areas of the foot where pain, tenderness, and inability to bear weight suggest a fracture. A review of studies involving more than 15,000 patients concluded that the Ottawa rules identified patients with ankle fractures more than 95% of the time.

Ankle sprain functional treatment

To recover from an ankle sprain fully, you’ll need to restore the normal range of motion to your ankle joint and strengthen its ligaments and supporting muscles. Studies have shown that people return to their normal activities sooner when their treatment emphasizes restoring ankle function — often with the aid of splints, braces, taping, or elastic bandages — rather than immobilization (such as use of a plaster cast). Called functional treatment, this strategy usually involves three phases: the RICE regimen in the first 24 hours to reduce pain, swelling, and risk of further injury; range-of-motion and strengthening exercises within 48–72 hours; and training to improve endurance and balance once recovery is well under way.

Generally, you can begin range-of-motion and stretching exercises within the first 48 hours, and should continue until you’re as free of pain as you were before your sprain. Start to exercise seated on a chair or on the floor. As your sprained ankle improves, you can progress to standing exercises. If your symptoms aren’t better in two to four weeks, you may need to see a physical therapist or other specialist.

Exercises to help restore function and prevent injury

Range-of-motion, stretching, and strengthening: First 1–2 weeks

flexes

Flexes. Rest the heel of the injured foot on the floor. Pull your toes and foot toward your body as far as possible. Release. Then point them away from the body as far as possible. Release. Repeat as often as possible in the first week.

ankle-alphabet

Ankle alphabet. With the heel on the floor, write all the capital letters of the alphabet with your big toe, making the letters as large as you can.

press-down-pull-back

Press down, pull back. Loop an elasticized band or tubing around the foot, holding it gently taut (A). Press your toes away and down. Hold for a few seconds. Repeat 30 times. Tie one end of the band to a table or chair leg (B). Loop the other end around your foot. Slowly pull the foot toward you. Hold for a few seconds. Repeat 30 times.

ankle-eversion

Ankle eversion. Seated on the floor, with an elasticized band or tubing tied around the injured foot and anchored around your uninjured foot, slowly turn the injured foot outward. Repeat 30 times.

ankle-inversion

Ankle inversion. Seated on the floor, cross your legs with your injured foot underneath. With an elasticized band or tubing around the injured foot and anchored around your uninjured foot, slowly turn the injured foot inward. Repeat 30 times.

Stretching and strengthening: Weeks 3–4

standing-stretch

Standing stretch. Stand one arm’s length from the wall. Place the injured foot behind the other foot, toes facing forward. Keep your heels down and the back knee straight. Slowly bend the front knee until you feel the calf stretch in the back leg. Hold for 15–20 seconds. Repeat 3–5 times.

seated-stretch

Seated stretch. Loop an elasticized band or tubing around the ball of the foot. Keeping the knee straight, slowly pull back on the band until you feel the upper calf stretch. Hold for 15 seconds. Repeat 15–20 times.

rises

Rises. Stand facing a wall with your hands on the wall for balance. Rise up on your toes. Hold for 1 second, then lower yourself slowly to the starting position. Repeat 20–30 times. As you become stronger, do this exercise keeping your weight on just the injured side as you lower yourself down.

stretches

Stretches. Stand with your toes and the ball of the affected foot on a book or the edge of a stair. Your heel should be off the ground. Use a wall, chair, or rail for balance. Hold your other foot off the ground behind you, with knee slightly bent. Slowly lower the heel. Hold the position for 1 second. Return to the starting position. Repeat up to 15 times, several times a day. This exercise can place a lot of stress on the ankle, so get your clinician’s go-ahead before trying it.


The Orthopedic & Sports Medicine Center of Oregon is an award-winning, board-certified orthopedic group located in downtown Portland Oregon. We utilize both surgical and nonsurgical means to treat musculoskeletal trauma, spine diseases, sports injuries, degenerative diseases, infections, tumors and congenital disorders.

Our mission is to return our patients back to pain-free mobility and full strength as quickly and painlessly as possible using both surgical and non-surgical orthopedic procedures.

Our expert physicians provide leading-edge, comprehensive care in the diagnosis and treatment of orthopedic conditions, including total joint replacement and sports medicine. We apply the latest state-of-the-art techniques in order to return our patients to their active lifestyle.

If you’re looking for compassionate, expert orthopedic surgeons in Portland Oregon, contact OSM today.

Phone:
503-224-8399

Address
1515 NW 18th Ave, 3rd Floor
Portland, OR 97209

Hours
Monday–Friday

Treating Ankle Injuries

Article featured on UCSF Health

Ankle sprains are the most common ankle injury among regular athletes and weekend warriors. The top orthopedic complaint, sprains occur in an estimated 27,000 Americans a day.

Many athletes, however, who suffer from ankle sprains tend to play right through their injury, which can lead to lifelong problems with recurring sprains, unstable joints, arthritis-like pain or other complications like tendon or cartilage damage. And the earlier in life a sprain occurs, the higher the chance of recurrence. Therefore, it’s important to properly treat initial sprains, especially in young athletes.

If you sprain your ankle and it hurts to run, you should sit out the rest of the game. Once a sprain has occurred, follow these three steps to help you recover:

Step 1: RICE

Follow the instructions represented by the acronym RICE as often as possible for three days. RICE stands for rest, ice, compression (with an elastic ankle wrap) and elevation (toes above the nose). For significantly swollen ankles or if limping persists for more than three days, you should see a doctor.

Step 2: Rehabilitation

To prevent permanent damage to the ankle, take steps to achieve better range of motion (flexibility), balance and strength. Many of these exercises can be done at home.

Range of motion exercise

Place one foot on a stairway step. Allow the back heel to stretch downward over the edge of the step. Hold each foot in this position for 30 seconds.

Balance restoration exercise

Stand on one leg with your eyes closed. Gradually build up to standing 30 seconds on each leg. Repeat three times.

Strength exercise

Lie on your side on the sofa, with the upper leg hanging over the edge. Place the top of your foot through the handles of a plastic shopping bag filled with one to two pounds of weight (one or two cans of soup). Slowly lift your toes toward the ceiling and hold for three seconds. Repeat 10 times.

Step 3: Supportive devices

When back to playing sports, previously injured athletes should probably wear an ankle brace, no matter how much they have rehabilitated their ankle or how good their sneakers. An injured ankle will never have the same support again, so a brace should be considered.

Step 4: If pain continues

For ankle pain and significant instability that persists despite adequate rehabilitation or physical therapy, you should see a doctor for further evaluation. You may have injured the cartilage or tendons in your ankle, which may require special testing.

UCSF Health medical specialists have reviewed this information. It is for educational purposes only and is not intended to replace the advice of your doctor or other health care provider. We encourage you to discuss any questions or concerns you may have with your provider.


The Orthopedic & Sports Medicine Center of Oregon is an award-winning, board-certified orthopedic group located in downtown Portland Oregon. We utilize both surgical and nonsurgical means to treat musculoskeletal trauma, spine diseases, sports injuries, degenerative diseases, infections, tumors and congenital disorders.

Our mission is to return our patients back to pain-free mobility and full strength as quickly and painlessly as possible using both surgical and non-surgical orthopedic procedures.

Our expert physicians provide leading-edge, comprehensive care in the diagnosis and treatment of orthopedic conditions, including total joint replacement and sports medicine. We apply the latest state-of-the-art techniques in order to return our patients to their active lifestyle.

If you’re looking for compassionate, expert orthopedic surgeons in Portland Oregon, contact OSM today.

Phone:
503-224-8399

Address
1515 NW 18th Ave, 3rd Floor
Portland, OR 97209

Hours
Monday–Friday

8:00am – 4:30pm

Everything you need to know about total ankle replacement surgery

Everything you need to know about total ankle replacement surgery

Article Featured on OSMSBG

A total ankle replacement, also called total ankle arthroplasty, is a surgical treatment option for patients suffering from ankle pain, typically due to arthritis or injury. If this pain is impacting a patient’s quality of life or keeping them from walking comfortably, they might benefit from a total ankle arthroplasty. While lesser known than a total hip, knee or shoulder replacement, total ankle replacements are gaining popularity.

Read more

Common Foot and Ankle Injuries

Common Foot and Ankle Injuries

Article Featured on WebMD

Ankle injuries are often thought of as sports injuries. But you don’t have to be an athlete or even a “weekend warrior” to turn your ankle and hurt it. Something as simple as walking on an uneven surface can cause a painful, debilitating sprain.

Read more

Achilles Tendinitis

Article Featured on AAOS

Achilles tendinitis is a common condition that occurs when the large tendon that runs down the back of your lower leg becomes irritated and inflamed.

Read more

Ankle sprains: What's normal and What's not?

Ankle sprains: What’s normal and What’s not?

Article Featured on AAOS

Ankle sprains are the most common sports injuries, with an estimated 25,000 occurring every day in the US. Sprains can happen with any sport, including just walking across the yard! Ankle sprains are most common in ball sports such as basketball, soccer, volleyball and others.

Read more